Learn how to manage your account groups and use them to organize your accounts
What are Account Groups?
Account groups is a feature that assists in organizing your accounts into different groups or categories. Organizing your client accounts using account groups can be beneficial in many ways, including reporting, applying credit limits, placing accounts on hold, etc. A common use of account groups is separating commercial accounts from residential accounts, or placing accounts on hold and preventing further activity for those accounts.
Where are the account groups managed?
Account groups can be found in Weighing System (or W8 for short) under 'Settings -> Advanced -> Account Groups'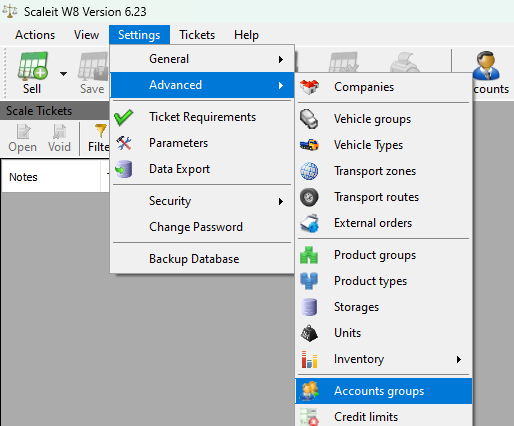
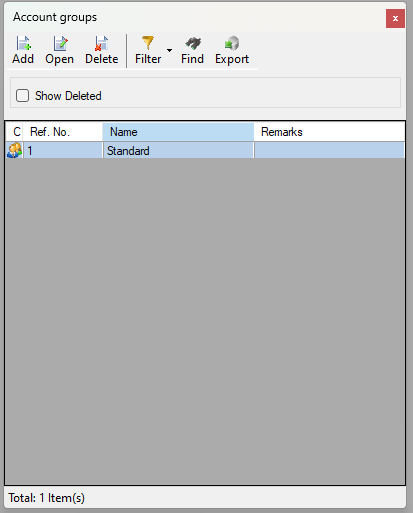
Once you click on 'Account Groups', a new window will open itemizing all the account groups that are currently in your system. Every installation comes with a default account group called Standard, and acts as the default account group when creating new accounts. From this window, you can add, edit, and delete your account groups as you see fit.
How do I create or edit an account group?
Once you have the 'Account Groups' window open, with all the current account groups listed, you can click on 'Add' (top left on icon bar) if you wish to create a new account, or double click on an existing account group to make changes. Upon clicking add or selecting an account group to edit, a new window will open with all available account group options available.
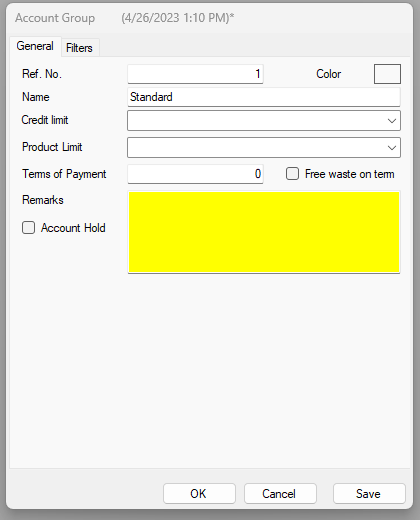
- Ref. No - Stands for 'Reference Number' and is typically used to help identify the account group. This field should be auto-populated with an acceptable value, however, it can be changed as long as the new number is unique.
- Name - Should be descriptive of the group. i.e. 'Commercial', or 'Residential'.
- Credit Limit - If you would like to assign a credit limit (not described in this article) to an entire account group or collection of clients, you would select one here.
- Product Limit - If you would like to assign a product limit (not described in this article) to an entire account group or collection of clients, you would select one here.
- Terms of Payment - Sometimes used for reporting or custom exporting. If you would like to specify net terms for a collection of clients (i.e. 15 days, 30 days, etc), you can do so here.
- Account Hold - This feature is not available for all versions. Allows you to place a full-stop on a collection of accounts, preventing future tickets for the clients associated with this group. If this feature is missing on your application and you would like to have it, please give our general support line a call at (855) 722-5348 and request to be updated.
- Remarks - Any notations or comments you would like to have on your account group goes here.
- Filters (tab) - Allows you to limit the selectable products when creating new tickets for accounts within this account group. For more details, see article 'How to filter products using Account Groups'.
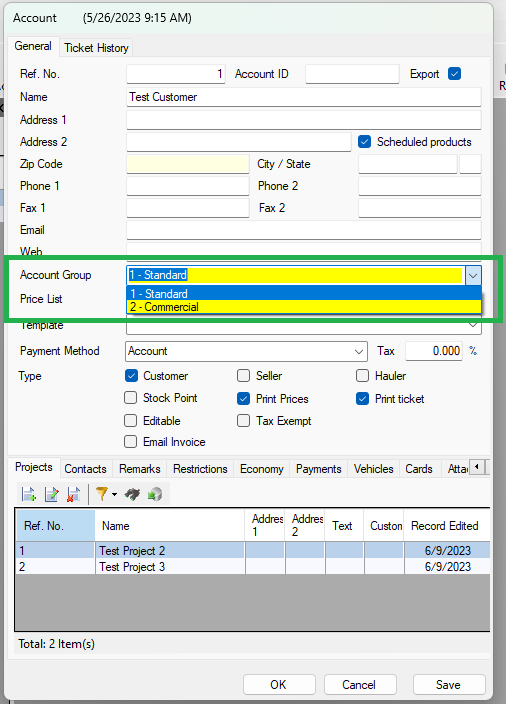
How do I assign or add a client to an account group?
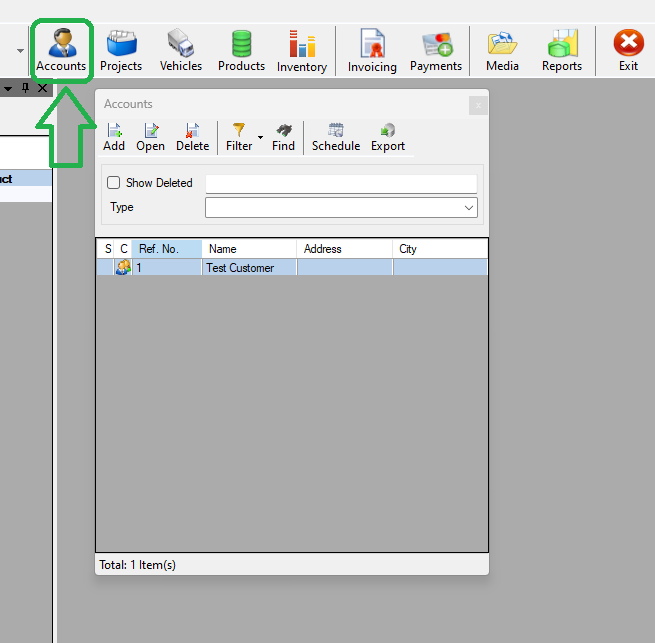
To assign a client or account to an account group, first locate the account you wish to assign. You can do this by clicking the 'Accounts' icon from your main screen, then double clicking on the account from the list.
Once you open the account you wish to assign, locate the 'Account Group' drop down, then select the desired group for that account. When finished, select 'OK' or 'Save' at the bottom to save your changes.