In this article, we'll show you how to set up auto emailing tickets, invoices, and reports.
First, we will need your email provider's smtp settings. We recommend using the Gmail SMTP Server for sending the email. To enter your email provider's smtp settings into Scaleit W8, follow these steps below.
1. Open up Scaleit W8 and navigate to Settings.

2. Click on Parameters.

3. Click on the Email & SMS tab and enter your email address, password and email provider's smtp settings.

4. If you're using Gmail, you will need to login to your Gmail account to create an App Password.
Once you're logged into your Gmail, click on your Profile Picture -> Manage your Google Account.

5. Click on Security.
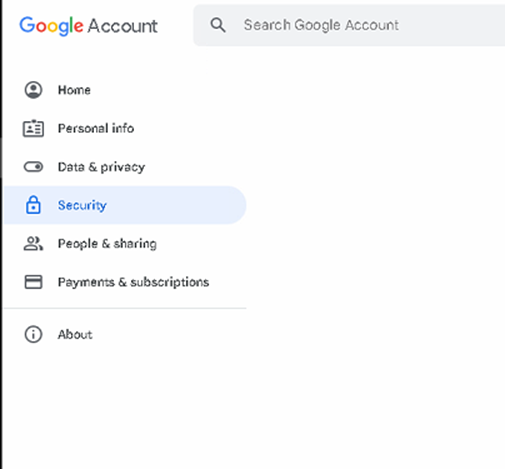
6. Click on 2-Step Verification to enable / set up 2-step Verification.

7. Once it's enabled, you should see App passwords at the bottom of the page. You can also access App Passwords by clicking this link: https://myaccount.google.com/apppasswords

8. Click on Other (Custom name).
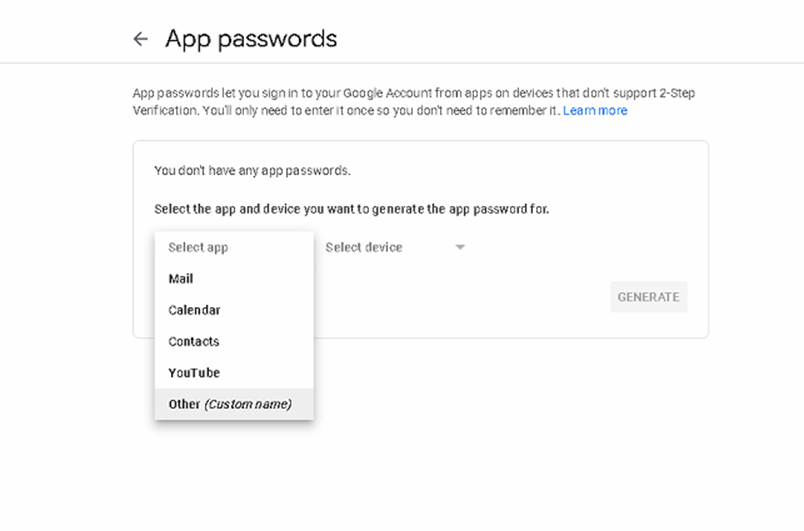
9. Name the app [Scaleit W8] and then click Generate.
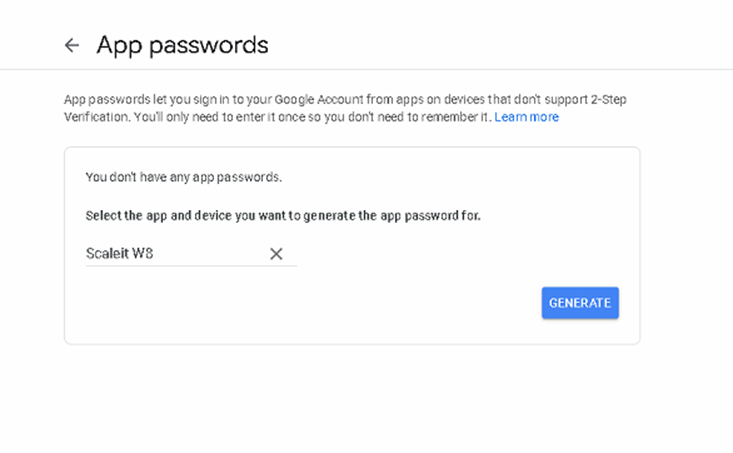
10. Copy the generated app password.

11. Paste it into the Scaleit W8 Email Password field, check the Send ticket by email when weighing is complete to:, check the Customer checkbox and click OK.

12. To verify that your email settings are correct, create a test ticket w/ a customer w/ an email.
The recipient should get the emailed ticket within a few minutes after finishing the ticket.

13. Invoices can be auto emailed when creating invoices. Check the Email Invoices checkbox in the accounts and /or projects.

14. If Group by Tickets is selected when creating invoices, it will send the email to the client &/ project. If Group by Clients is selected, it will send the email to the client. If Group by Projects/PO# is selected, it will send it to the project.
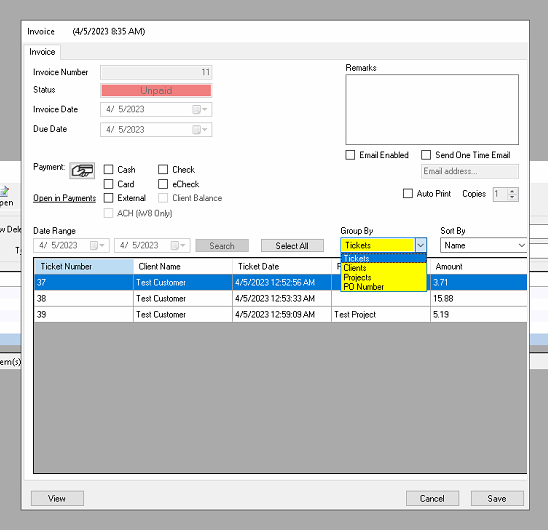
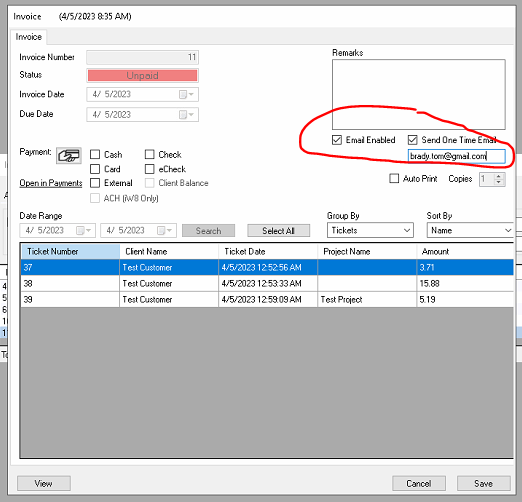
15. The Email Enabled checkbox is for filtering out the clients/projects w/ disabled Email Invoices. The Send One Time to Email checkbox will send the email to the email entered below the Send One Time Email checkbox and to the customer/projects email if enabled.
16. Tickets can be grouped together in a daily email at your preferred time and sent to the department, customer, hauler, seller, project, & vehicle emails. To send all tickets grouped together by customer in a daily email, go back to Settings -> Parameters -> Email & SMS tab. Check the Send all tickets grouped together in a daily email at checkbox. Set it to your preferred time. Select Customer in the Group email by dropdown. Check the Department checkbox, click OK to save and close, and make sure the recipient’s email is in the Department’s email field.

17. A report can be auto emailed daily to the department email. To auto email a report daily, go to Settings -> Advanced -> Companies.

18. Select Company.

19. Select the correct department.

20. Check the Send report daily at: checkbox, set the time to your preferred send time, click on the Report dropdown to select your preferred report template, and click OK to save and close. If the correct recipient email is in the department's email field, you should receive the report within 10 mins.

