
Learn how to configure the GAC-2700 for use with Scaleit Weighing System
Links to user manuals
Connecting to the PC
On the back of the GAC-2700 is a single RS232 port (see page 8 on user manual). You will need to use that port to connect the GAC to the PC that is using Weighing System. 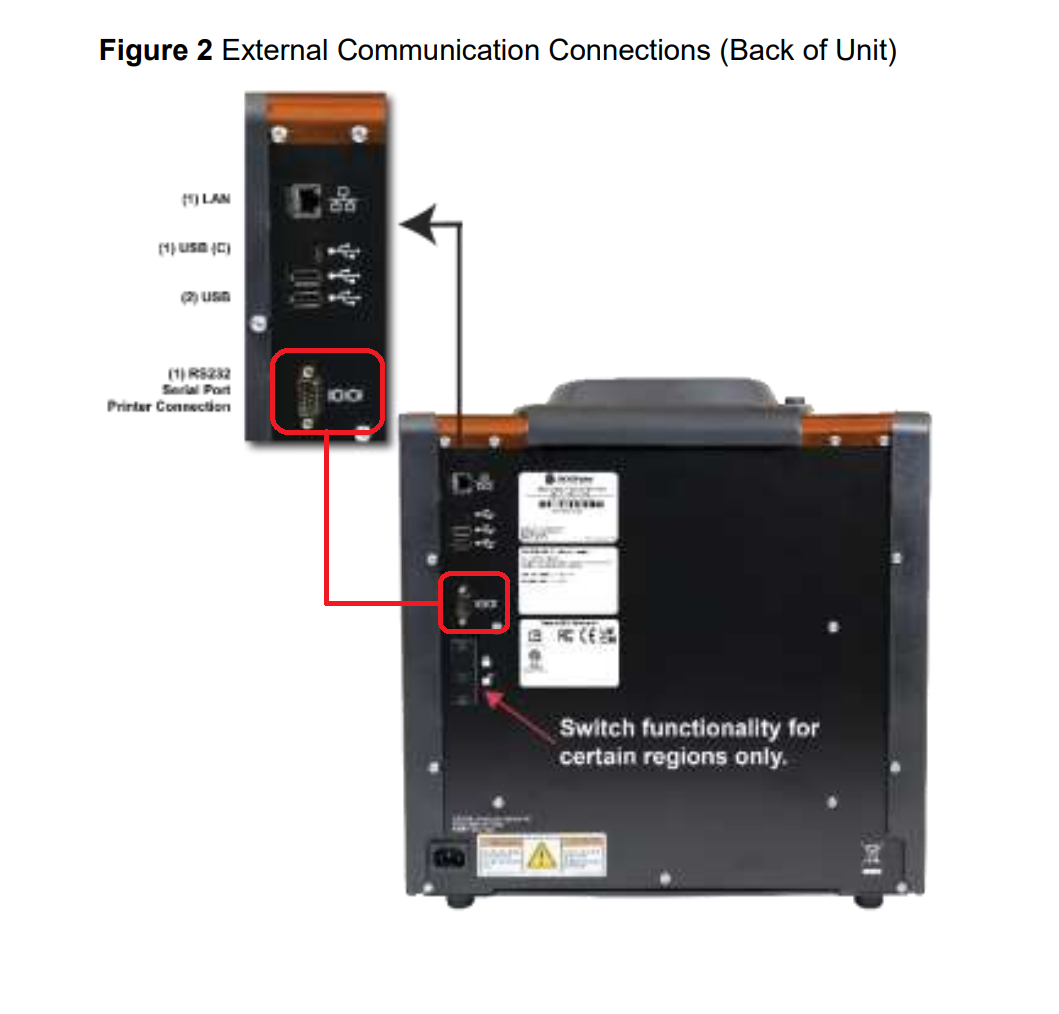
If your PC has a RS232 port, then a direction connection between the two is possible, otherwise, typically a RS232 to USB adapter is required. Note that we do recommend against using a USB HUB when connecting this device to the computer.
Configuring the GAC - 2700
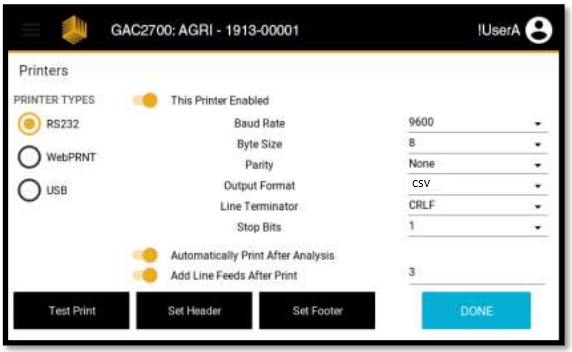
The GAC-2700 communicates with Weighing System via RS232 (or COM port) by sending the sample information through the GAC printer output. To configure the GAC - 2700 printer settings, navigate to 'Settings' -> 'Printers' on the GAC and set the following values;
(note: Selected is typically yellow)
- Printer Types: 'RS232'
- 'This Printer Enabled' is selected
- 'Baud Rate' is set to 9600
- 'Byte Size' is set to 8
- 'Parity' is set to None
- 'Output Format' is set to CSV ( Not CSV+)
- 'Line Terminator' is set to 'CRLF'
- 'Stop Bits' is set to 1
- 'Automatically Print After Analysis' is selected
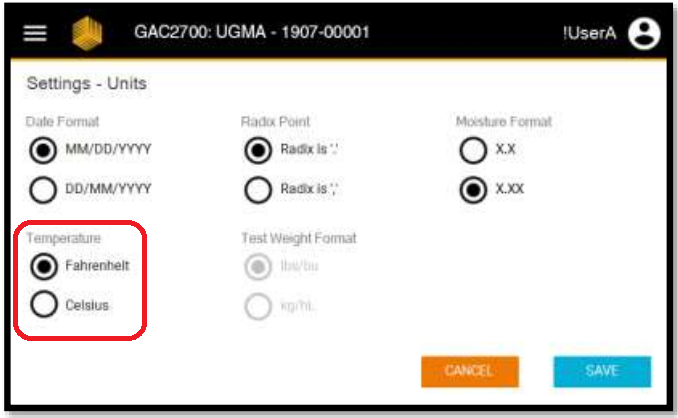
Once all of those values are set, navigate to 'Settings -> Units' and ensure the Temperature unit is 'Fahrenheit'.
At this time, you should be able to test the output from the GAC by connecting to it using Hyperterminal (or similar COM applications)
Testing the communications
Testing the communication between the GAC-2700 and the PC can be done by using an application like Hyperterminal or PuTTY to open the COM port and display the output received from the GAC. To do so, you must first determine which COM port is being used for the GAC-2700. To do this, open device manager on the PC and navigate to section called 'Ports (COM & LPT)'
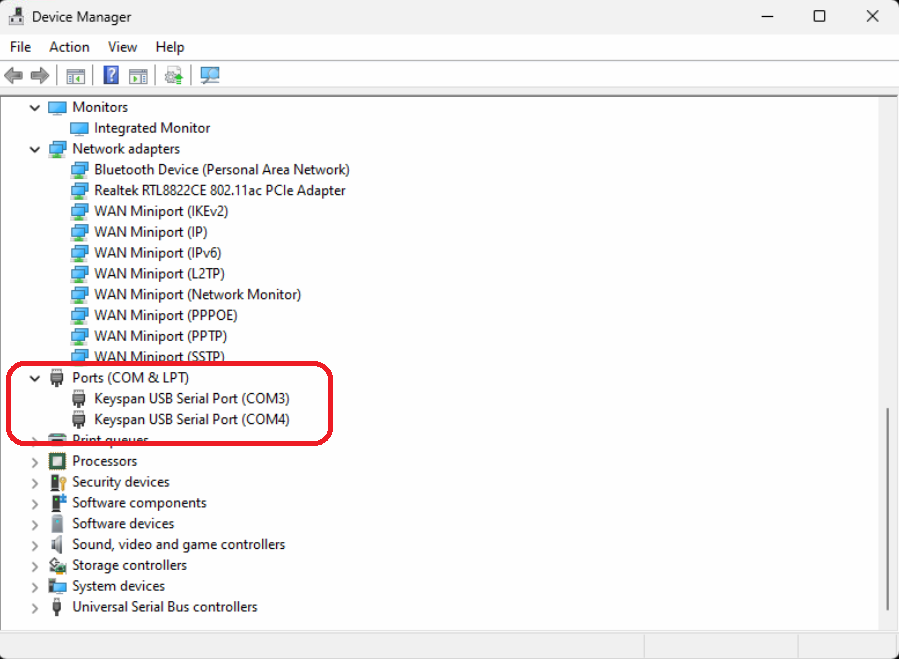
If multiple COM ports are available, you can determine which one is the GAC by unplugging it from the PC (must be unplugged from the PC, not adapter or GAC) and take note of the COM ports that are still there, then plug the cable back into the PC to see which one appears. Once you determine which COM port is for the GAC, establish a connection to it using your communications program of choice.
Once a connection is established, navigate back to the printer settings on the GAC (Settings -> Printers) and click 'Test Print'. At this time, you should see an output similar to the image below
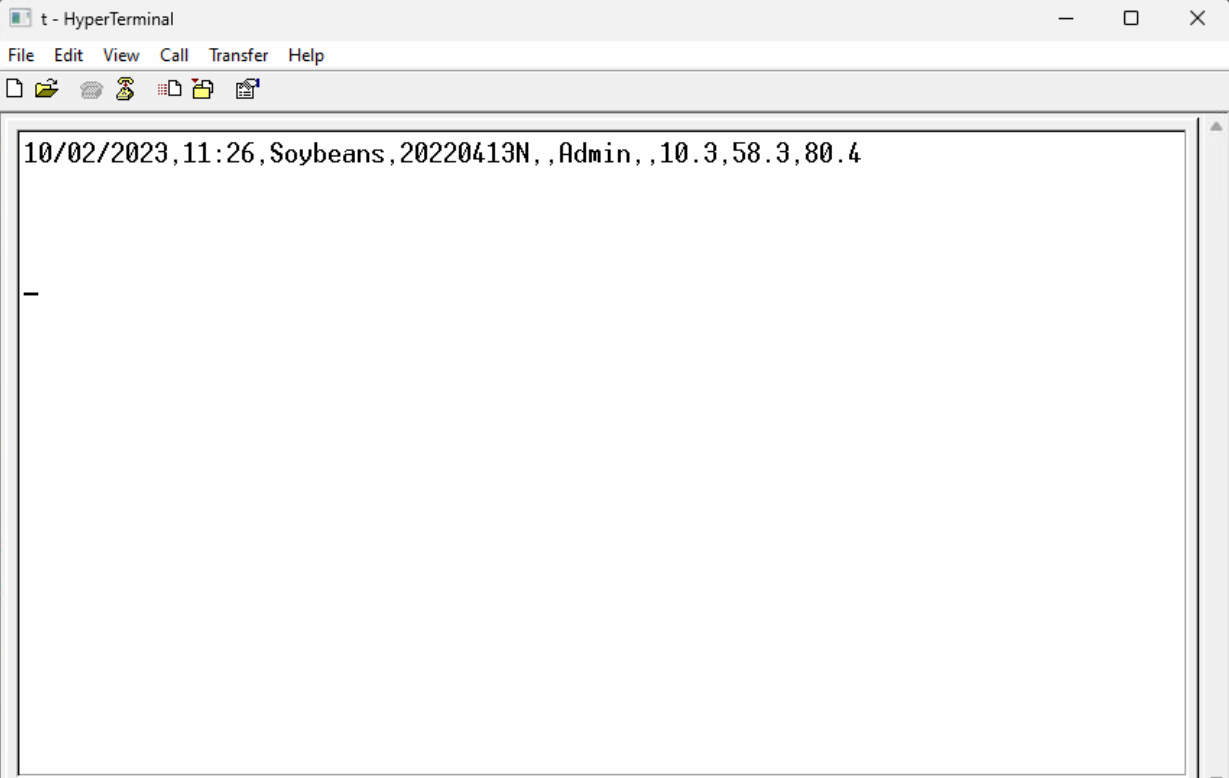
(note: output may vary from version to version, however, all outputs should be in CSV format and the datapoints should not be labeled).
Configuring Weighing System
Important Notes before proceeding:
- Weighing System version must be 6.23 for GAC-2700 device support
- Business type for the department must be 'Agricultural' to support moisture readers
- Ensure that the Moisture Reader window is on the screen layout. You can add the window by going to 'View -> Moisture Readers' and dock it on the screen accordingly.
To configure Weighing System to use the GAC-2700, we must first define the device under Settings -> Parameters -> Devices -> Moisture Readers
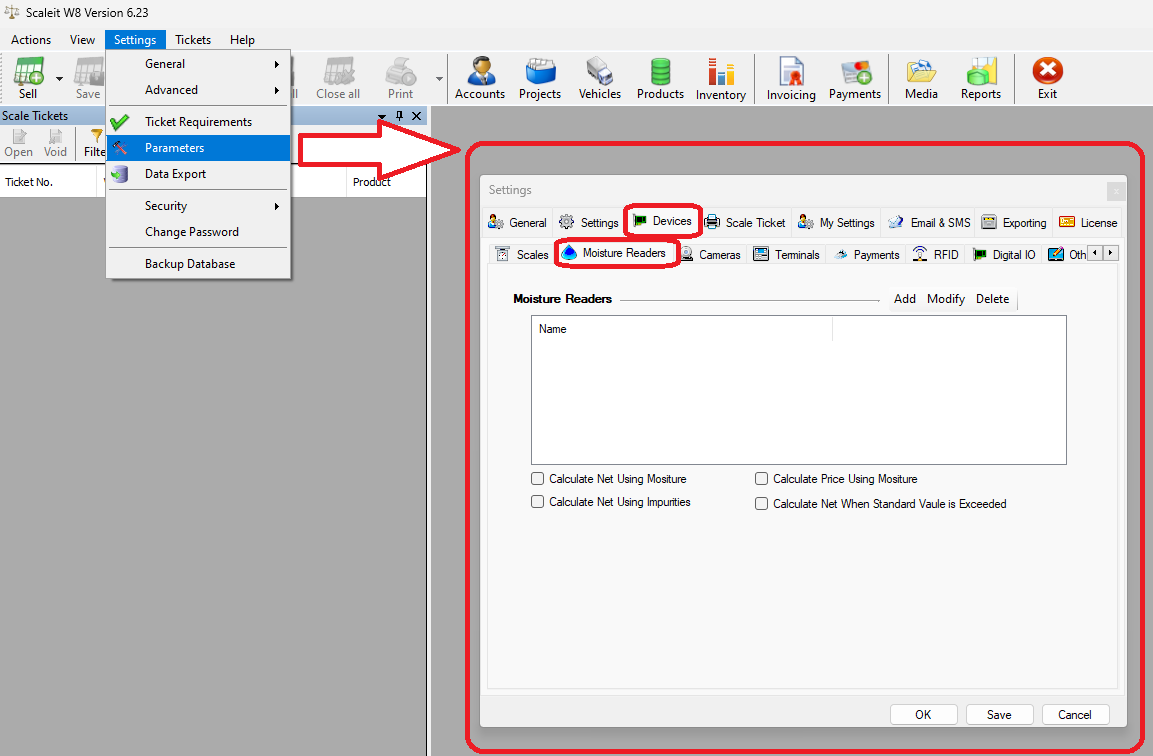
Then click 'Add' to create a new device. 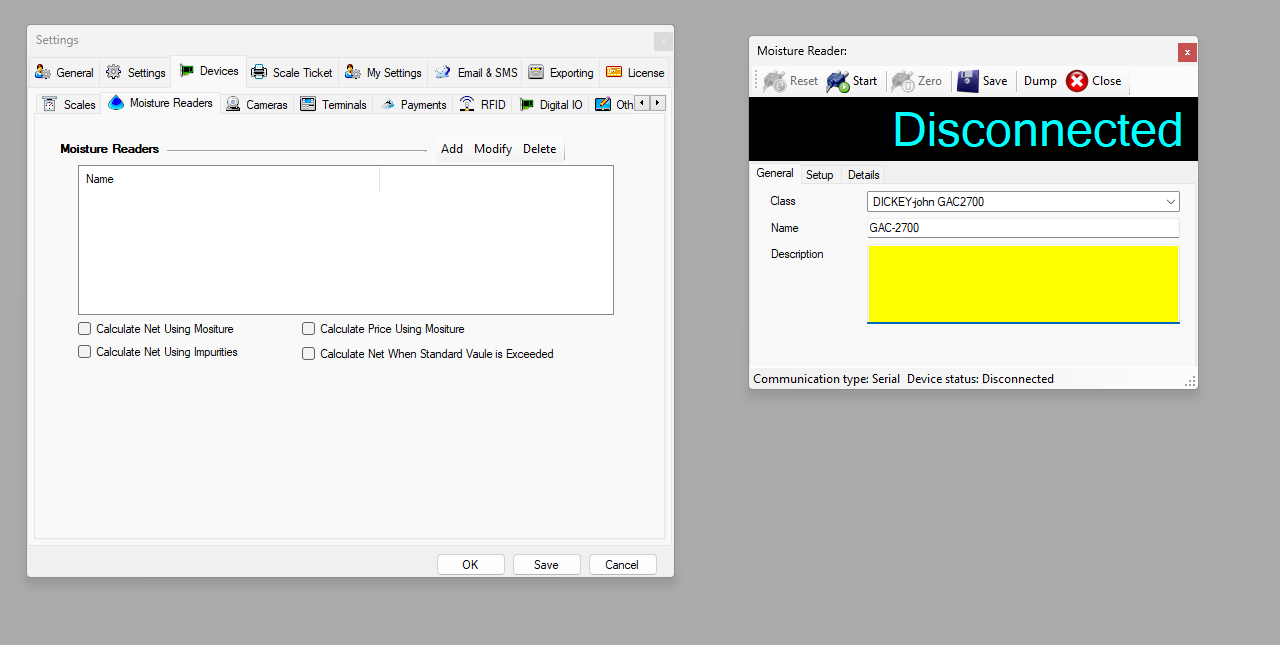
Set the values as follows;
- Class - DICKEY-john GAC2700
- Name - This is the display name of the device, and can be named what you would like
Next, go to the 'Setup' tab and set the values as follows;
- Comm. type - Serial
- Comm port - The COM port of the GAC determined in earlier steps.
Once configured, click on 'Start' at the top of the window.
Using the GAC-2700 in Weighing System
To use the GAC-2700 to populate all the sample data into Weighing System, follow the below steps;
- Start a new ticket
- Select your desired product. This product name must match the name of the product being sampled in the GAC-2700
- Run the sample on the GAC-2700
- Once the GAC is done sampling, it will send the information to Weighing System. When this happens, you will see the status change on the moisture reader window to "Data Available"
- Press the green box button to the left of your product (see image)

The sample information should then populate accordingly in the remaining fields.