
Learn how to limit the selection of products for your accounts by using the filters located in the Account Group.
In this article, you will learn how to limit the product selection available when creating a ticket based on the Client or Supplier's account group. This can be beneficial by only making valid options available for the account, reducing the possibility of selecting the incorrect product.
Important Note: This feature is only available on Weighing System version 6.23.05 and later.
What are account groups?
Account groups is a feature that assists in organizing your accounts into different groups or categories. To get more information on account groups, their usages, and how to manage them, please visit Organize your accounts using Account Groups
How do I filter products?
To select the products you want to have available for an account group, first navigate to the account group in 'Settings->Advanced->Account Groups', and double click on the group you would like to apply the filters to.

Once you have opened the desired account group, navigate to the 'Filters' tab located at the top of the window. This tab will display any active filters for the current account group and will allow you to add and remove filters as needed.
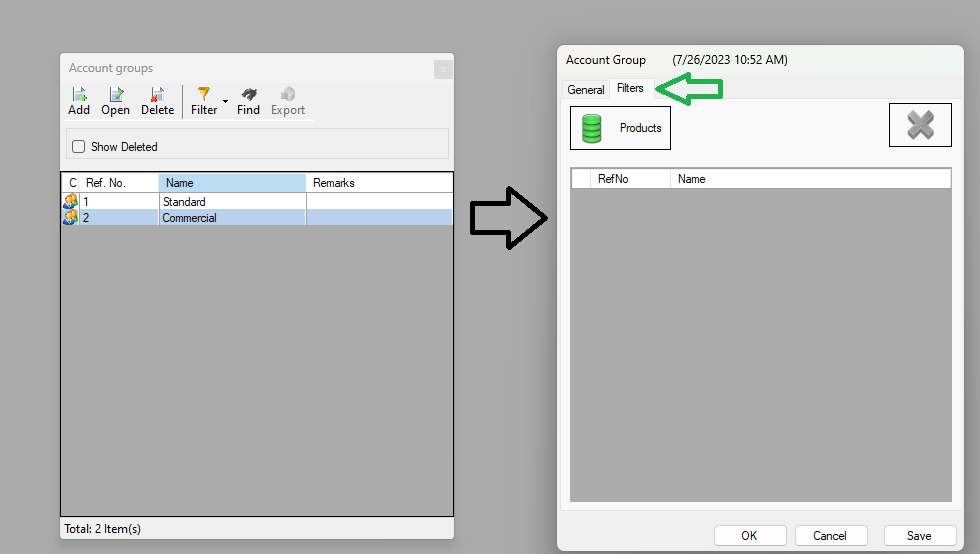
Filtering products behaves like a 'whitelist', meaning any option selected (or displayed under filters) will be the options available when creating a ticket. When no items are selected, then all options will be available when creating a ticket.
To add products to the filter, click on the 'Products' button to open a window that displays all available options. Simply select the options you wish to add and click the 'Select' button on the top icon strip when done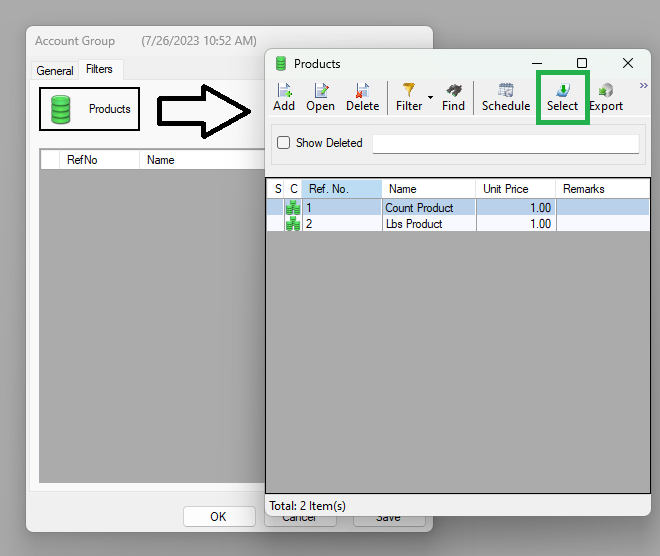
Note: Items that are already selected / filtered will not show on the new window.
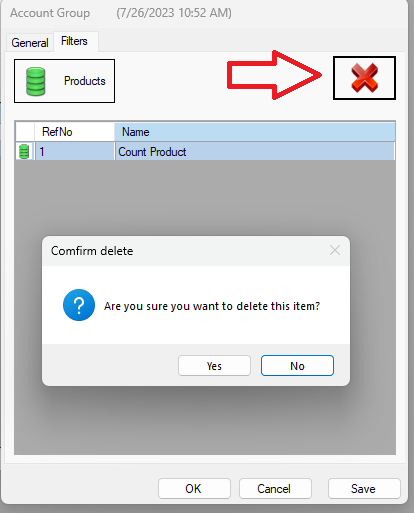
After clicking 'Select', you the window should close and you should now see your selected items listed under the 'Filters' tab of the account group
To remove a product from the filters, select the items you wish to remove from the 'Filters' tab, then click on the red 'X' on the top right. You will be prompted to confirm your action, clicking 'yes' will remove the item, clicking 'no' will abort the action and the item will remain.
How do I apply the filters to an account?
Every client account has an 'Account Group' field. To apply the filters to an account, you must assign the account to the appropriate group. This can be done by navigating to the account and assigning the 'Account Group' field accordingly. Once done, click 'OK' or 'Save' to save the changes
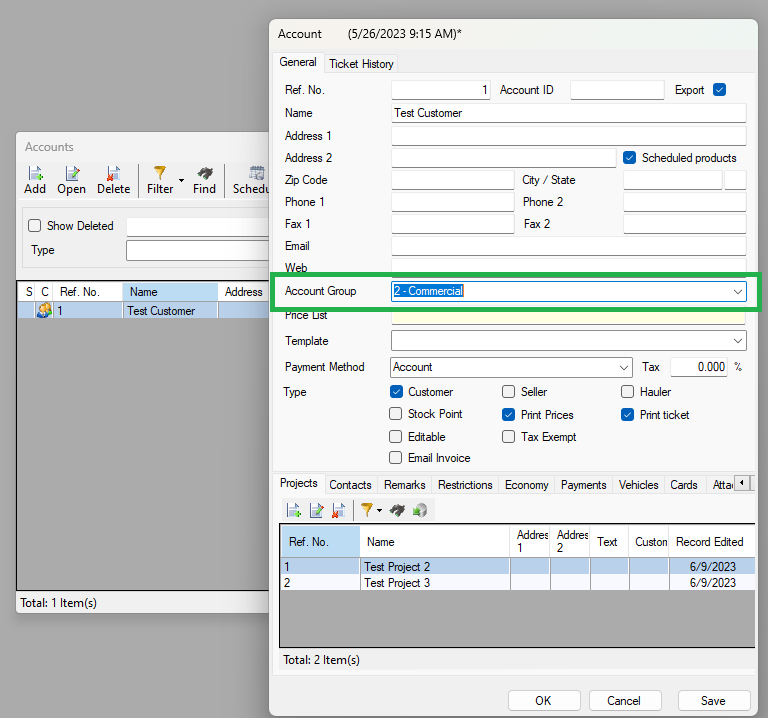
For more information and detailed instructions on assigning an account to an account group, see the 'How do I assign or add a client to an account group' section of the Organize your accounts using Account Groups article.
Is it working?
Now that you have applied the filter to the account group, then assigned the account to the group, we can see the filters work in action. Lets create a new ticket and test it out.
Note: This step may vary depending on your custom layout. The image below uses Customers (not suppliers) and allows for multiple product lines.
First, create a new ticket and double click on the product quick selector to see all of your available products before assigning the account.
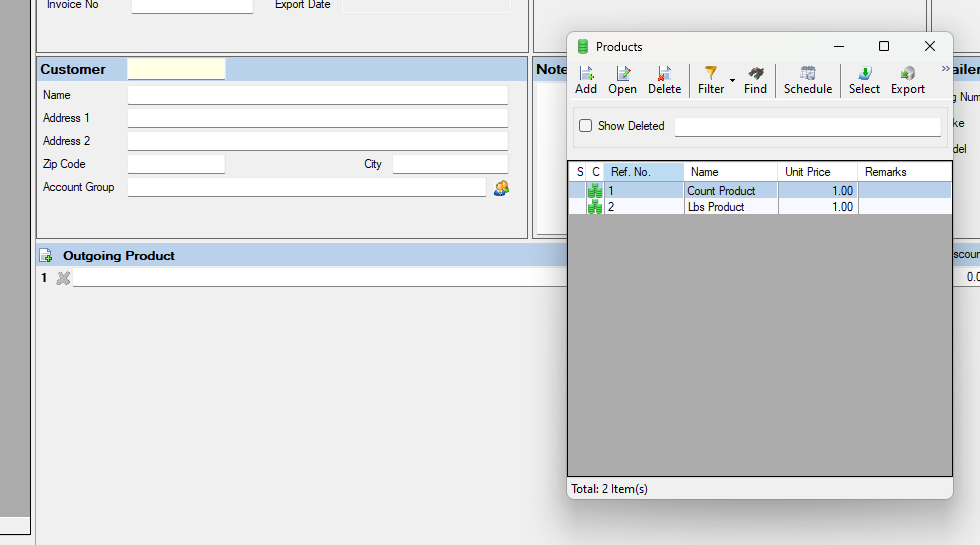
The above image shows both products currently configured in the application as available for selection. Now let's close out without selecting a product, add the account to the ticket, then double click on the product selector to see all available options.
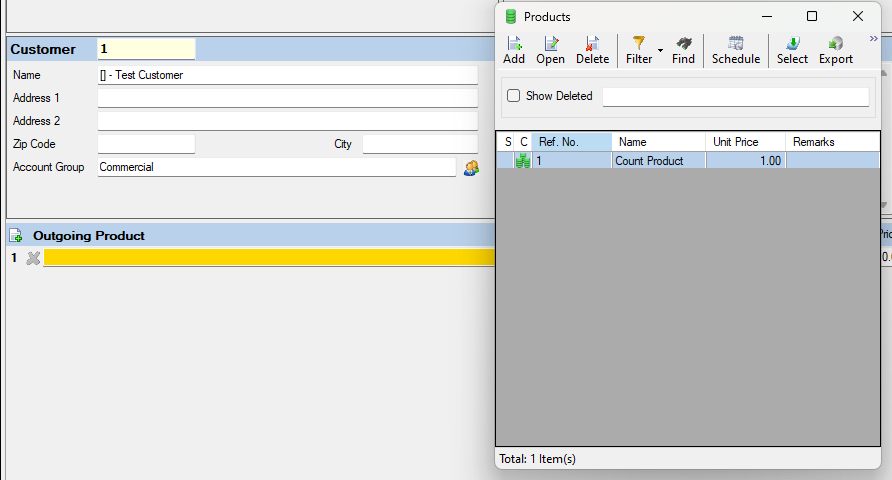
Now only the option listed in the account group filters are available, meaning the account group is assigned correctly and the filters are working accordingly!