
This Article will help you setup and manage virtual cash drawers for each PC.
How to Create and Assign a Virtual Cash Drawer
How to Create a Cash Drawer

First you will have to open the Cash Drawer window using Settings -> Parameters -> Advanced -> Cash Drawers.
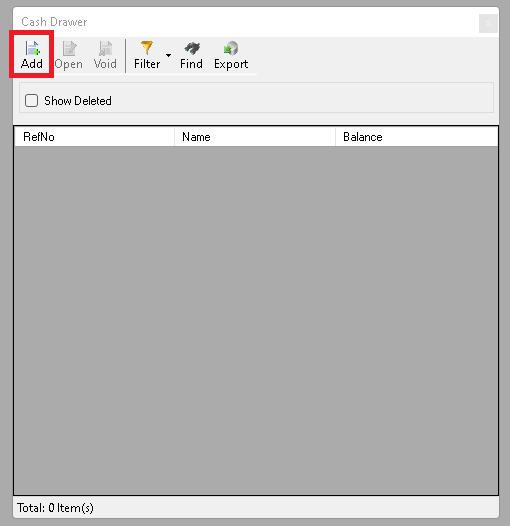
This window allows you to can create, delete, edit cash drawers. To create a new cash drawer click 'Add'.
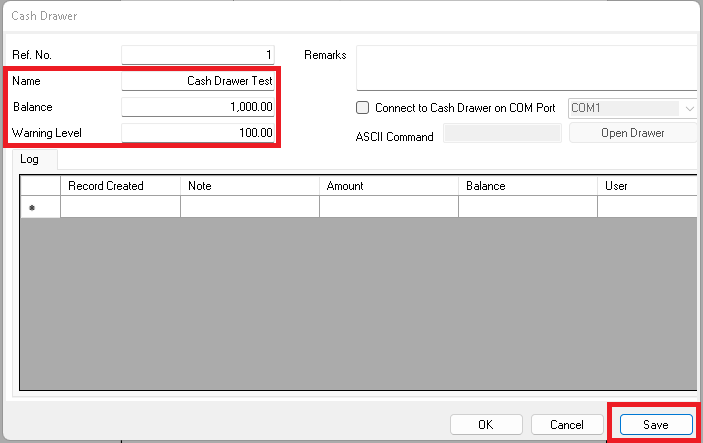
This will open the Cash Drawer editor, here you want to fill out the Name, Balance, Warning Level, and then click Save.
Name - Different names will help you distinguish cash drawers on reports and if multiple PCs need a cash drawer, there should be 1 virtual cash drawer per PC.
Balance - This amount will be your starting amount in the virtual cash drawer and should match your physical cash drawer. Balance and physical count of money at end of day should match.
Warning Level - This will alert you once the cash drawer balance gets below the warning level and remind you to make a cash drop.
(To connect to a physical cash drawer refer to this article How to Setup Physical Cash Drawers)
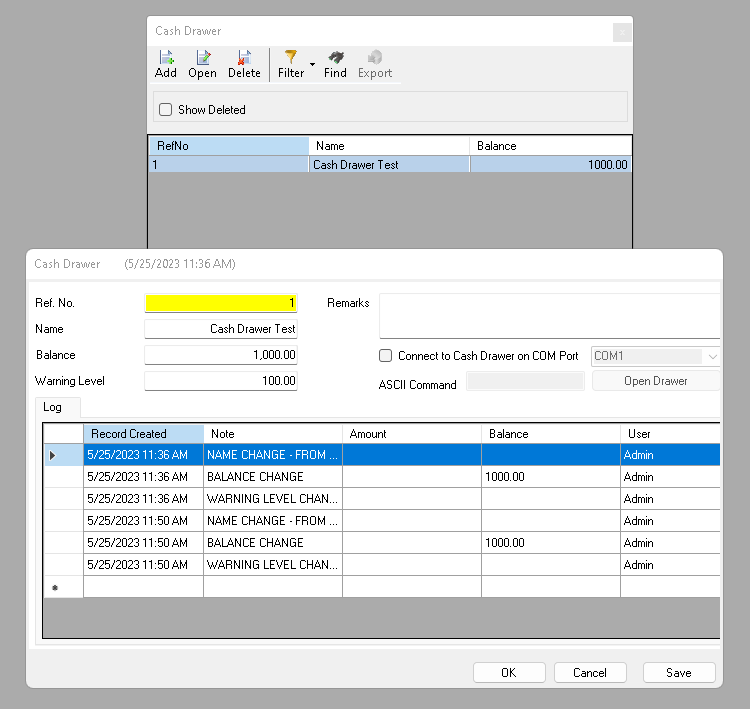
Once saved, you can close this window using OK. This should update the Cash Drawer window and display the cash drawer you created. If you then open the cash drawer editor using the 'Open' button or 'double click' you will see the name change, balance change, and warning level change and any other manual change that has been done.
How to Assign a Cash Drawer to the PC
To assign a cash drawer to the PC follow the next steps.
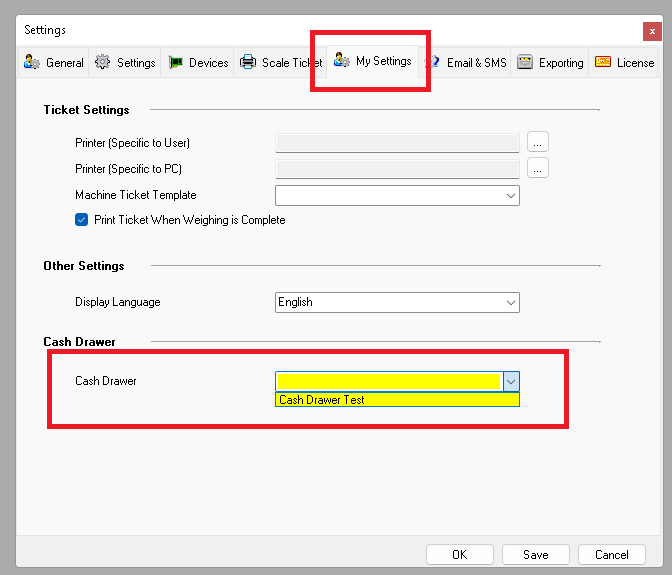
Settings -> Parameters, once open move to the My Settings tab and select a Cash Drawer for this PC.
(Each PC should have their own Cash Drawer, having multiple PCs use the same Cash Drawer will cause issues)

Once Selected, click Save or OK and restart the software, when closing the software for the restart it will ask if the cash drawer amount is correct. If the amount is correct, click Yes. If the amount is incorrect, click No and enter the correct amount.
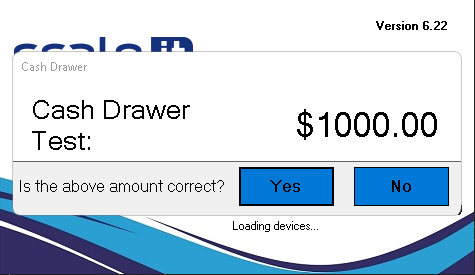
From now on, when you start the software, it will prompt you to confirm the amount in the cash drawer.

After logging in, you will be able to view the cash drawer value displayed in the bottom left corner of the screen.
From now on any cash ticket you do will be automatically added/subtracted from the cash drawer balance.
*Note for business type:
Waste: Incoming Tickets = Incoming cash, Outgoing Tickets = Outgoing Cash
All Other: Incoming Tickets = Outgoing cash, Outgoing Tickets = Incoming Cash
Cash Drops & Payouts
By clicking on the amount in the bottom left corner, as seen in the last picture, you can open the Cash Drop or Payout option.

Cash Drop will allow you to add money to the cash drawer and the payout subtracts from the cash drawer.


After clicking Add/OK the software will confirm one more time before processing the request.
Reporting
The reporting window will let you run reports on the changes to the cash drawer.
The current default report is named Cash Drawer v3.
If more information is needed on how to run reports click here